| Print this page - use Landscape |
Search the WeetHet Pages |
|||
| WeetHet is being updated! - Current articles will slowly move to www.tweaking4all.com For excellent webhosting that is reliable and affordable, we highly recommend: LiquidWeb |
||||
|
On this page ...
Required software We need :
Install these applications before continuing.
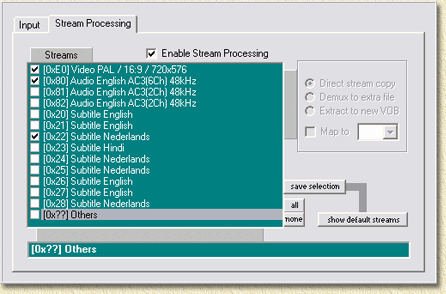
Step 1: DVD to Hard disk Insert the DVD into the DVD-ROM and start Smartripper (See also Rip DVD to hard disk for more about SmartRipper). Click the tab Stream Processing. In our example we only need to select; [ExE0] Video PAL / 16:9 / 720 x 576, Note: this refers to a Dutch DVD. Naturally, if you want a different language, or TV system then this is possible too. Select a folder where to store the files and click "Start"
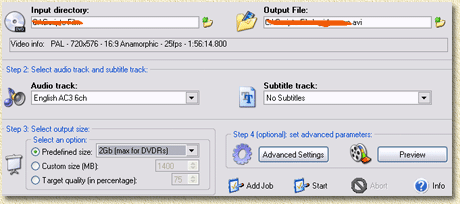
Step 2: VOB to AVI Open Auto GK. At "input directory" select the folder where you dumped the .vob files (SmartRipper). The "output file" can be the same folder if you like to. For the "audio track" we select "English AC3 6Ch" and for subtitle "no subtitles". Click "add job" and finally click "Start". The movie will now be converted to an .avi. This does take a while (my AMD xp3000+ was running for almost 2 hours to get this done). However; the quality is definitely worth it!
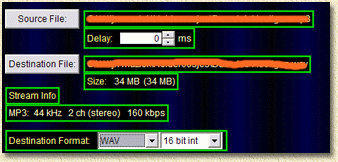
Step 3: Ac3 audio to WAV audio Now we will convert the AC3 file to a WAV. We do need to rip the AC3 again with Smartripper to get it as a separate file. Now start HeadAC3he. As a "source file" we select the AC3 file, the output field will be set automatically. Select "Destination format" as "WAV". Click "Start".
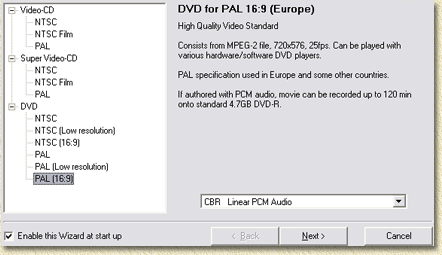
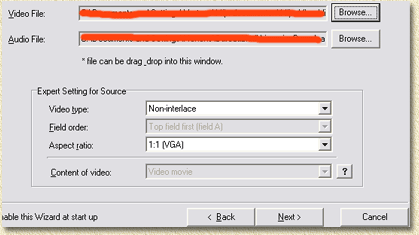
Step 4: AVI & WAV to M2V & WAV Open TMPGEnc and select "options" - " environmental settings" and set direct show to the highest priority. Now select "File" - "project wizard". In the upcoming screen select "DVD -> PAL (16:9)" (still assuming we're doing a PAL movie) and click "Next". Note: Select the template you want to use, so NTSC, KDVD, etc are valid too - as long as it's a DVD template.
Now it's time to select the right audio and video files. For the "video file" select the .avi file we made with Auto GK, the "audio file" should be the .wav we created with HeadAC3he. Now click "next" until TMPGEnc starts.
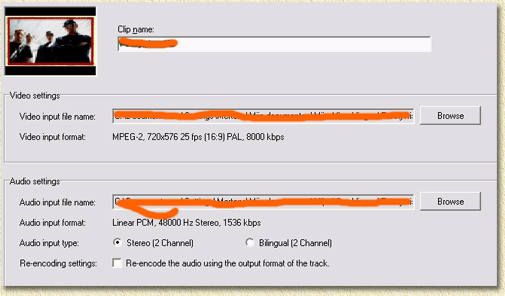
Once TMPGEnc is done, it's time to open TMPGEnc DVD author. Step 5: Creating DVD files and burn 'm Click the tab "source setup" and click "Add file". Now select the .m2v that TMPGEnc made. The audio file will be selected automatically. Click OK to continue.
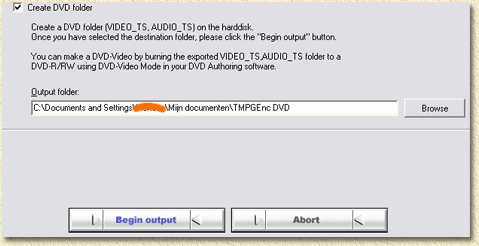
Now click the "output" tab. The only thing you need to do is to click the "begin output" button and ... wait.
Once this is finished a popup windows of the DVD writing tool will open. Insert an empty DVD in your DVD burner and click "write DVD". Now it's all a matter of waiting till the burner finishes it's job ... |
||||


