|

| Print this page - use Landscape |
Search the WeetHet Pages |
|||
| WeetHet is being updated! - Current articles will slowly move to www.tweaking4all.com For excellent webhosting that is reliable and affordable, we highly recommend: LiquidWeb |
||||
|
Op deze pagina ...
Duplicating a DVD, What do we need? For starters we do need : DVDShrink and Nero Burning rom. A trial version of Nero, can be downloaded for free. DVDShrink can be downloaded from the download page. Ripping a DVD Ripping is not needed, as DVDShrink can do that by itself. Incase you run into trouble, consider the alternative approach where we rip the DVD to harddisk first using SmartRipper. Note: When usign SmartRipper, do not use the "Open disk" button in DVDShrink. Rather use the "Open Files" buttons! Insert the original DVD into the DVD-Rom player and start DVDShrink (screenshots are based on version 2.3). Click"open disk" (
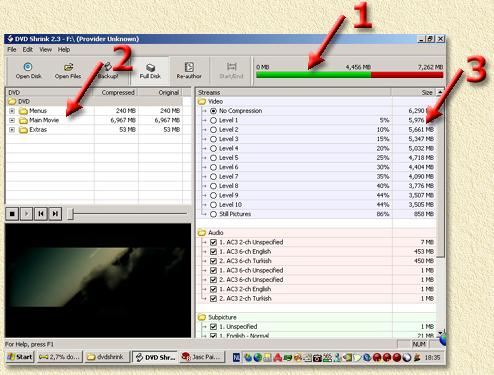
Note: if the DVD hasn't been opened before, DVDshrink will take some time to analyze the DVD. After that the following information will be shown :
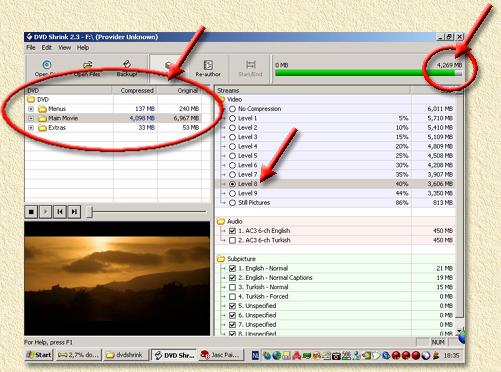
1. Size of the DVD, here 7,26GB. 2. DVD filestructure and size of the files. 3. Compression level, 1 to 10 and still pictures I always begin with setting the compression of the folders menu and extra's to the max; level 10. This way, more space is left for the movie (which is the most important part of the DVD anyway). You will see in the screenshot below that I set the compression of the main movie to level 8 to make it fit a DVD5.
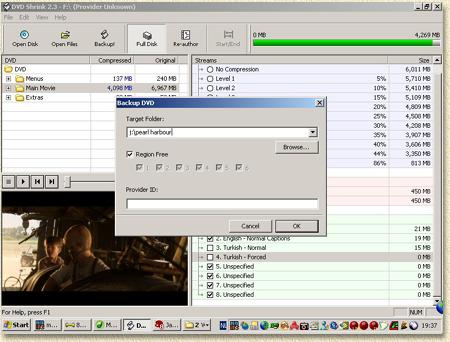
Click the "Backup!" (
Now click "OK" and DVDshrink will start doing it's thing .... It strongly depends on your hardware, how long it will take DVDShrink to re-compress. Burn DVD with Nero Burning rom Nero usually starts either with the "New compilation" window or the wizard.
If neither appear, select "New" for the "File" menu. Using the Nero wizard: in the first screen select DVD, in second screen select compile new CD, in the third screen select other CD types and in the last screen select Video DVD. In the New compilation window, select on the leftside DVD-video (in the upper left corner select DVD and not CD) and click New on the rightside. On the rightside an Windows Explorer kind-a screen appears. On the leftside, you will see a DVD compilation, showing audio_TS and Video_TS.
With the file-explorer on the right, browse to the folder where DVDShrink dumped the converted DVD files and drag them to video_TS. There should be at least one 1 IFO, 1 BUP and 1 VOB file in the Video_TS folder (it can also be more than 1). Now click the burn button (don't forget to insert an empty DVD in the DVD-writer) and after about an hour, you DVD is finished.
|
||||
 ) and select the drive where the DVD can be found.
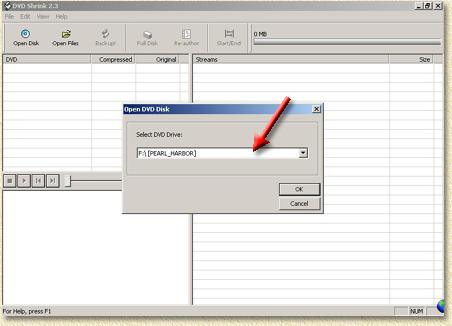
 ) button. A dialog will ask you where to put the copy.