| Print this page - use Landscape |
Search the WeetHet Pages |
|||
| WeetHet is being updated! - Current articles will slowly move to www.tweaking4all.com For excellent webhosting that is reliable and affordable, we highly recommend: LiquidWeb |
||||
|
On this page...
Page overview
NOTE: Before recording a CD, make sure
the source CD is CLEAN! If not, this might be a source of errors and failures.
If you need to clean your CD (yesterday's pizza is still stuck on it)
then use a dry cloth and move it gently from the center of the CD to
the outerring of the CD. Do NOT move it in circles or up and down!
Always be careful, and after each stroke always check the result! If the pizza is not to be removed with this technique,
consider using water. What media type should I use? CD-Recordable or a CD-Rewriteable? Tip: if you want to know more about CD's then you might want to read the page "How do CD's work?". On the page "How do I create my own CD?" you will find a bit of text explaining the difference between CD-recordables and regular CD's. Well, when you are creating you first CD's, then I'd suggest you should use CD-Rewriteable if you think it's a shame to toss yet another $0.50 down the drain because you screwed up a CD. CD-Rewriteables can be erased and reused. CD-Recordables are write once, so reuse (except for decoration purposes maybe) is not possible. Please note: some CD-players cannot handle CD-Recordables and even worse most normal CD-players cannot handle CD-Rewriteables. In particular Sony CD-players are known for their lack of CD-Recordable and CD-Rewriteable compatibility. Most Philips players are capable of handling CD-Recordables, even the very old CD-players. Tip: When using a DVD-player for audio playback, and CD-Recordables are not read, then consider a test with a CD-Rewriteable since the surface of these CD's resemble the surface of a regular DVD (It worked with my Toshiba). I can't speak for all you folks out there, but I do know that I hate hearing 15 songs of the same artist in a row. I'd rather have my own selection on a CD - specially when I'm driving in my car. So how do we do this then ? Basically it's pretty easy. First we copy the individual songs to the harddisk. Once we have enough songs, we burn them as an Audio CD on one CD. Sounds easy he? There is nothing stopping you from use songs from other sources. Check out the page "Where can I get MP3 files?" and the page "How do I create an MP3?". I also made a page "Introduction to MP3" if you'd like to know more about MP3. Note: Using Nero you can use both formats, WAV and MP3, mixed. Tip: the songs are stored on your harddisk as a WAV file, which can be played using the Windows Media player. Not only that! If you would create (any legal format WAV allowed and MP3 as well!) your own song, then Nero will be able to handle the file and write it as a normal song to the Music CD! Note: The Wizard cannot assist you here! Warning: this requires you to have at least 800 Mb free space on your PC's harddrive if you're using WAV files for a 74 minute CD. When using MP3's instead it will take only about 80Mb.! Before you can create a compilation CD, you must have songs (duh!). The songs must be stored on your harddisk in either WAV (best quality) or MP3 (less space needed). WAV are often used if: In situation a) you can use the LINE-IN of your soundcard to record from tape or pickup (you know: those black huge discs from way back...). For situation b) please read the page "How to copy songs to my harddisk". MP3 files are not an exact 100% copy of the orginal song - so quality is a bit less. On the other side: MP3 can be downloaded (often for free) from the Internet. For more details, please read the pages "How do I create an MP3" and "Where can I get MP3's?". So start collection
your songs FIRST. If the wizard appears, click "Close wizard"
so the "New compilation" window appears. In case this
does not happen, click the "New Compilation" button (
STEP 2: Select the "Audio-CD" icon STEP 3: (OPTIONAL) Select the "Audio" tab. Here we can enter the so called "CD-Text" content. CD-Text is a feature where the CD-player can display additional info like song title and artist in it's display. Most CD-players do not support this, but I got a hunch that this will be something that slowly enters the Audio CD arena. So you don't need to enter data here. If you don't enter data: remove the checkmark at "Write CD Text on CD". If you used the CD database: the text is entered automativally, so I'd suggest leaving this option enabled. Additionally you can set the "Audio filters to on the fly". This is only needed if you plan to use the "Disc at once" burning method (which I strongly suggest if your CD-writer supports this). STEP 4: Click the "New" button. A window called "Audio1" (number might be different) opens.
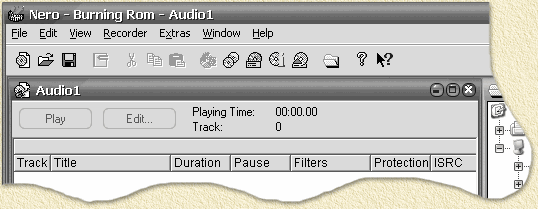
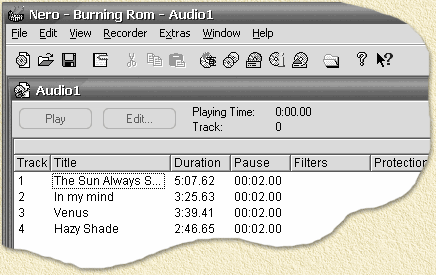
In this window we can now drag and drop our songs that we ripped (see: How to create WAV files or Where to get MP3's). Nero supports 2 ways of drag-and-drop:
It's up to you what you like best. Click the file/song you want and keep the left mouse button pressed and move to the "Audio1" window and once above this window, release the left mouse button. You just added a song.
After dropping songs you might notice a bar at the bottom of the Nero window ...
This bar shows you how much data/time has been used
on the new Audio CD. WARNING:
As you can see in this example: I used approximately 13 minutes, so I have space left for more songs. STEP 5: Burning .... Once you completed dragging and dropping (the CD does
not NEED to be completely filled) you can click the "Burn"
icon ( Now click the tab "Burn". Here you can check (not always) options like test burning. During the test a burn will be simulated - nothing will be written on the blank CD-Recordable. I usually simply use the highest writing speed, in "Disk at once" (check it) mode. Not all CD-Writers support "Disk at once", this is not a problem. If your drive supports technology like "Burnproof" you might consider using it too. I usually do. Since we (this is OPTIONAL) do not intend to burn additional songs later, you can check "Finalize CD". Some CD-players doe not like discs that are finalized. Click "Write" to start the writing. Nero will prompt you to insert the blank CD-Recordable or rewriteable when needed. |
||||


