|

| Print this page - use Landscape |
Search the WeetHet Pages |
|||
| WeetHet is being updated! - Current articles will slowly move to www.tweaking4all.com For excellent webhosting that is reliable and affordable, we highly recommend: LiquidWeb |
||||
|
On this page ...
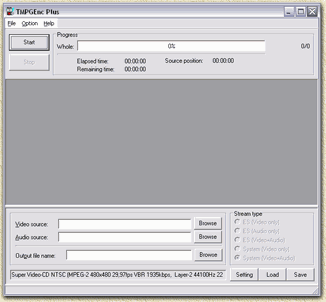
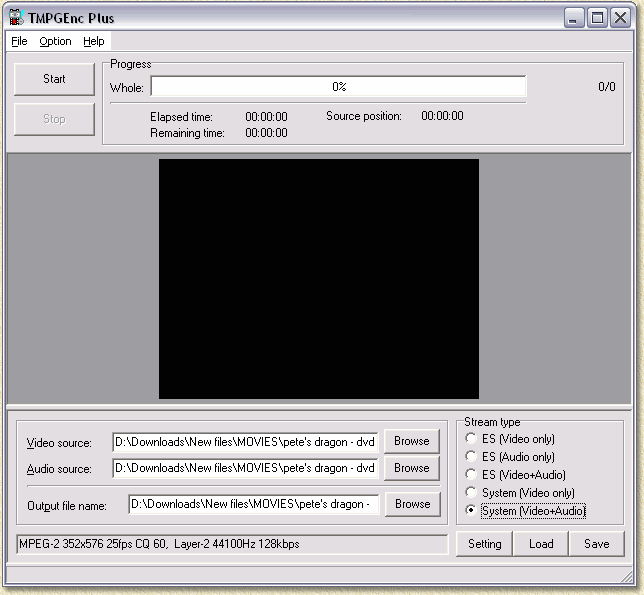
The required software Software for movie playback First try if you can playback the movie on your PC using the Window Media player. If not, then we will need to install (if not already) the Video Codec. For DivX go to the DivX homepage . This is needed for playback. MPEG Encoder uses the codec suitable for the movie, just as it does with basically any AVI file format. In order to transcode to KVCD, KSVCD or KDVD, we will need to install the KVCD templates. See the K(S)VCD Intro page for details. Software for transcoding Here we are at the core of our conversion process (called "transcoding"). Download TMPGEnc from the TMPGEnc website. First use the trial version to see if it works the way you expect it before buying the "Pro" version. I know I'm convinced that this is a tool worth it's money, but make sure you do too. Install it and run the application. Install the software first! The real work: TransCoding Transcoder means something like "converting from one format to another". After downloading and installing TMPGEnc, start it. You will see a window like this (I used version 2.59.47.155 Plus):
As you can see, TMPEnc can start with or without wizard. After a fresh install, TMPGEnc usually starts with the wizard. We will continue working with the wizard. Tip: In case the wizard is not visible, choose from the "File" menu the option "Project Wizard" (or simply press the key combination CTRL+W). Step 1: Select the proper format
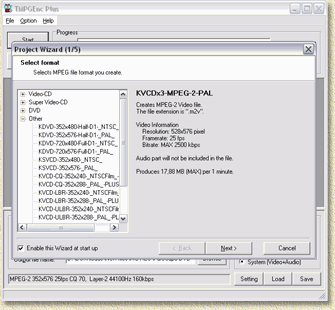
OK, in this wizard screen we can choose our target format. Make sure you do select the proper one. Try to avoid transcoding NTSC to PAL and viceversa as this usually causes problems with playback! Most DVD players support KVCD and KSVCD (See DVD Compatibility Database). Now click the "NEXT >" button. Step 2: Select Source file(s)
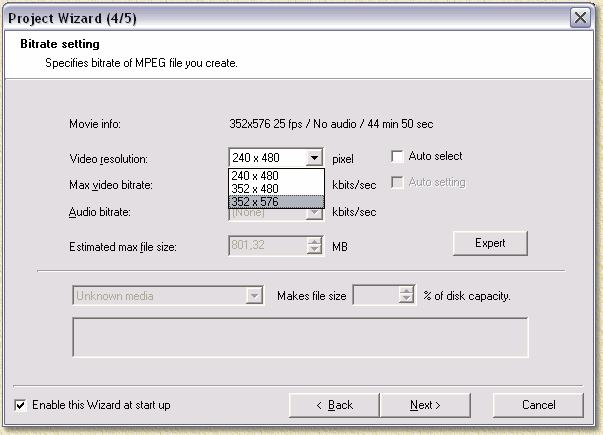
At the Video field click the "Browse..." button, and choose the AVI you want to convert. Close the dialog (after selection) by clicking "OK". Verify at the Audio field that it shows the same filename now (usually does). In case there is no filename here, the click "Browse..." for this option and SELECT THE SAME AVI FILE as you choose for Video. Note: Do NOT copy the other settings, like "Video type", "Field order", TMPGEnc will automatically enter data into these fields! Click "Next >" again. Step 3: Filter settings Leave this page as it is and click "Next >" again. Note: none of the checkboxes (except "Enable this Wizard at start up") are checked! This step is a bit more complicated, so please pay attention here! Make sure you select the proper resolution as recommended in the K(S)VCD Intro table!
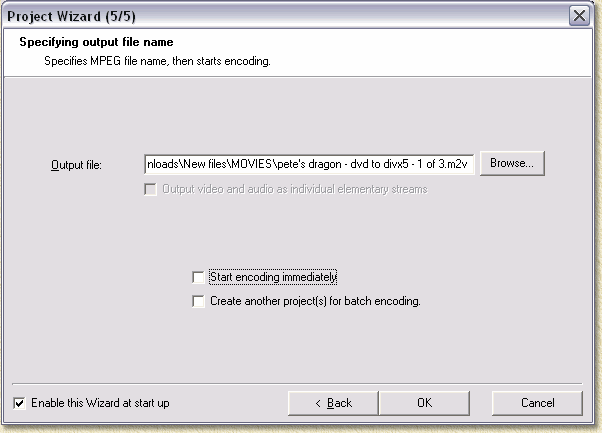
Click "Next >". Step 5: Output File In the next window, we select the "Output file:", the filename of the transcoded movie. Either enter it manually or click "Browse...".
NOTE! Remove the checkmark at "Start encoding immediately". Finally click "OK". Step 6: Ready to go? The next screen:
Make sure you check "System (Video+Audio)" !!!!!! Please run through this checklist before we can start:
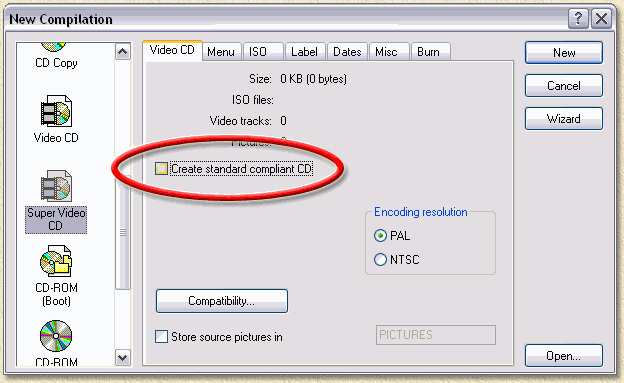
Final Step: Start transcoding This is simple: Click the "Start" button and wait hours ... (Usually 1 hour of video takes between 1 and 2 hours transcoding - depending on your PC!). Burning a K(S)VCD After the transcoding process you can use Nero (or similar (S)VCD capable application) to burn the CD. Note: Nero Express will not work properly as it will try to transcode the MPEG video again!!!
|
||||