| Print this page - use Landscape |
Search the WeetHet Pages |
|||
| WeetHet is being updated! - Current articles will slowly move to www.tweaking4all.com For excellent webhosting that is reliable and affordable, we highly recommend: LiquidWeb |
||||
|
On this page...
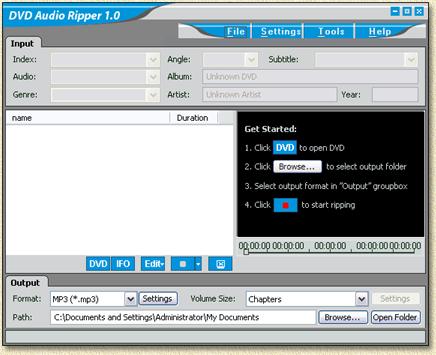
What do we need? First of all a Audio-DVD. For demonstration purposes I used the U2 Audio-DVD "Rattle and Hum". Second of all, a PC with a DVD-Rom drive and finally the tool "DVD Audio Ripper". After downloading and installing the tool, we're ready to rumble ... Ripping an Audio-DVD The process is really easy once you have seen it ... as usual ... :-) Start "DVD Audio Ripper". This screen will appear (screenshots are based on version 1.02):
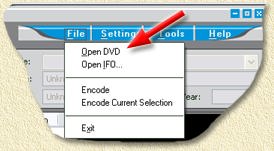
Now insert your DVD in the DVD-Rom player of your PC.
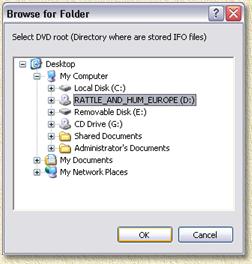
A dialog will appear asking you to select your DVD drive. Select the drive and click "OK".
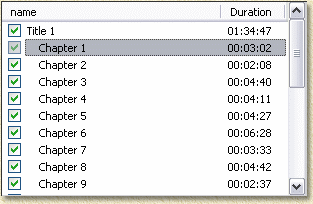
Note: some DVD's might be protected from copying. DVD Audio Ripper will now start analyzing the DVD and will come up with a list of audio tracks on the selected DVD:
Note: Here you see that "Title 1" is being selected. This should not be the case as it will otherwise rip the entire "movie" as a single audio file. So ONLY select the "chapters". In this list of tracks, you can use the F2 button to rename the tracks (used for filenames!). Select the track you wish to rename and press F2. Before we continue with the actual ripping, first enter some data in the "Input" section. Here you can enter artist, year, etc. This information is used to enter the MP3-tags of the MP3 files.
Next step will be to set which format files we want. We have 2 options: MP3 or WAV. To save space while trying this, we will continue using MP3, but feel free to use WAV if you want to. You can make your choice in the "Output" section.
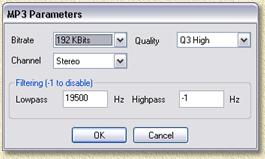
Next to the "Format" field, you can click the "Settings" button, allowing you to do specific setting, for example for MP3:
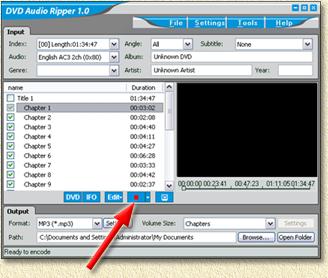
Once you have done all these settings, you can click the "Record" button:
It will take a while (on my Pentium M 1,6 Ghz it took about 30 minutes for this particular Audi-DVD). That's all folks ... enjoy! |
||||


