|

| Print this page - use Landscape |
Search the WeetHet Pages |
|||
| WeetHet is being updated! - Current articles will slowly move to www.tweaking4all.com For excellent webhosting that is reliable and affordable, we highly recommend: LiquidWeb |
||||
|
On this page ....
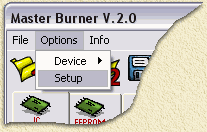
Proper Configuration of the software Before you start, make sure the settings are done properly. Click the menu "Options" and click the option "Setup"
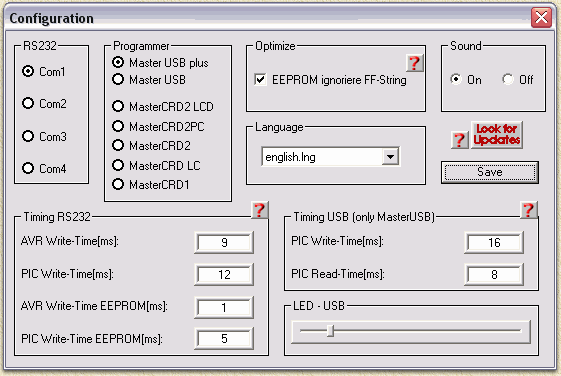
In the configuration screen;
On the left in the "RS232" section, select the proper COM-port. Next, in the "Programmer" section, select the MasterCRD Programmer you are using. If you do not have a MasterCRD programmer, then: Users of the SC-Master Phoenix should select the MasterCRD-2. You will need to have at least firmware version 1.05 in your programmer. Users
of the MasterA, VX-Multi, VP-20 or Multiprog-XL need to select the
MasterCRD LC.
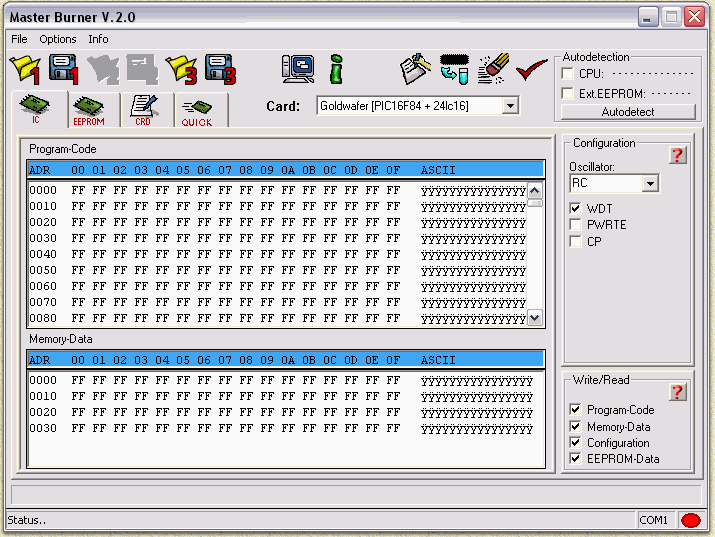
Finally click "Save" and you'll return to the mainscreen. Programming a SmartCard MasterBurner is a very simple application to use (compared to most others) and can deal with most SmartCards. From the menu "Option" - "Device" - "PIC" select "Goldwafer".
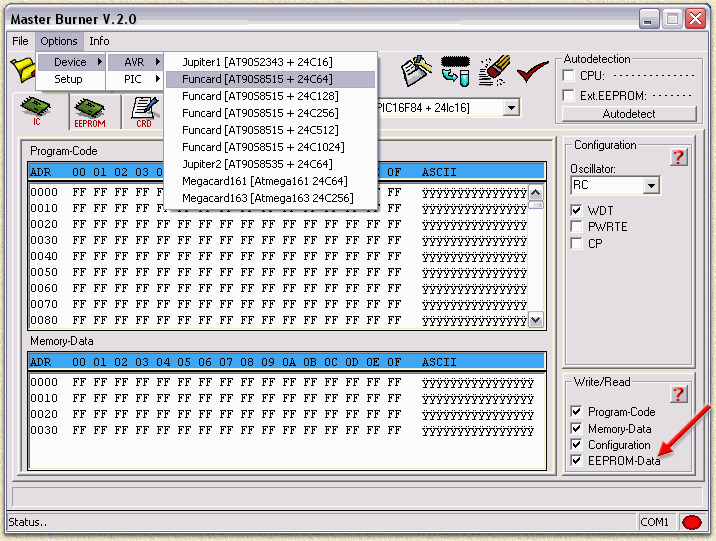
NOTE: Don't forget to check the option "EEPROM-Data" as indicated with the red arrow! You'll notice that the 3rd and 4th icon are greyed now! That's correct since we only need to specify the PIC (Icon 1) and the EEPROM (Icon 3).
Click Icon 1 ( Once again: Make sure the "EEPROM
Data" is
checked. Normally this should be checked by now.
Optionally you can erase the card before you
start programming. Click the "Erase" icon ( After erasing the card (or if you skipped that one), it's time to program
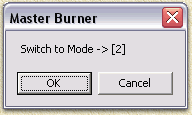
the SmartCard. Click the "Write" icon ( In the bottom line you will now see the writing progress. Note: When using a programmer like the MasterA, you will also be prompted to change mode if needed. Once the programming is done, Masterburner will identify this in this statusbar. From the menu "Option" - "Device" - "AVR" select "FunCard [AT90S8515 + 24C64]" which is a regular FunCard - select a different FunCard if your card has more memory.
NOTE: Don't forget to check the option "EEPROM-Data" as indicated with the red arrow! We now need to specify the PIC (Icon 1), Internal EEPROM (Icon 2) and the external EEPROM (Icon 3).
Click Icon 1 ( Once again: Make sure the "EEPROM Data" is checked. Normally this should be checked by now. Optionally you can erase the card before you start
programming. Click the "Erase" icon ( After erasing the card (or if you skipped that
one), it's time to program the SmartCard. Click the "Write" icon
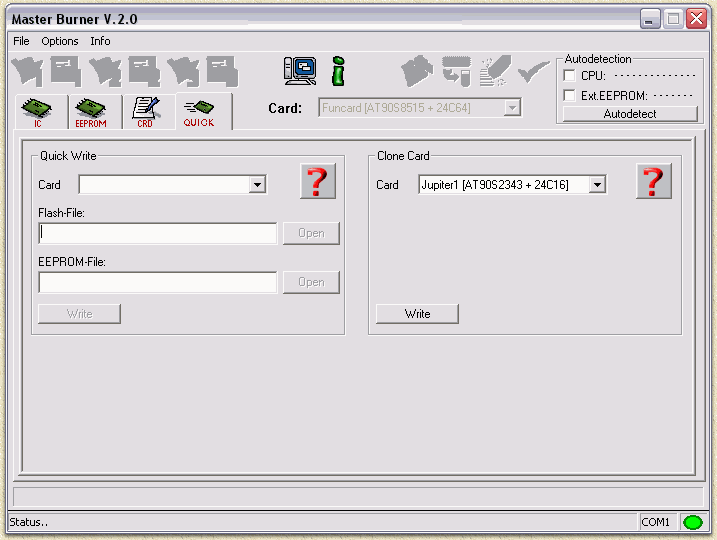
( In the bottom line you will now see the writing progress. Note: When using a programmer like the MasterA, you will also be prompted to change mode if needed. Once the programming is done, Masterburner will identify this in this statusbar. MasterBurner also has the capability to duplicate most SmartCards. The procedure for duplicating is identical for all card types, for example purposes we'll use the FunCard. First you click
on the "Quick" icon (
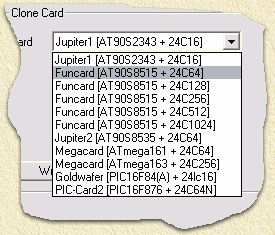
From the "Card" menu, select the card type you wish to duplicate:
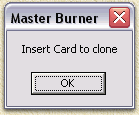
No click the "Write" button (don't be afraid - I know it sounds weird to Write when you really want to Copy but this really is the right button). Now the duplication process starts. A popup will ask you to insert the original;
Insert the Funcard and Click "OK". Note: If you have selected the wrong card type or if the Card is copy protected, the software will warn you. A pop up will occur, telling you that the device is locked. Check to see if the card type you selected is OK. If you did not select the correct card type, you will not be able to copy the card. Select the correct type and try again. Now Masterburner will walk you through the process and read the content of the card.
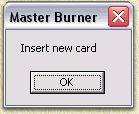
After reading it will ask you to insert the card to copy to and again will guide you through the copy process. At the bottom of the window, Masterburner will tell you when it's finished ("Card Ready..."). |
||||