|
On this page ...
|
The Slot-A, and the SocketA,
version of the AMD Athlon or Duron, are VERY good overclockable.
I got my AMD Athlon 500 running at 700 Mhz and my AMD
Duron 600 running at ... 900 Mhz !! That is pretty cool for
a sub $150 CPU !
Now I know, by the time you read
this, it's old news,...
For the Slot-A AMD Athlon overclocking we used a so called "Gold-Finger"
device. A little piece of PCB hooked up to the (hidden) gold-finger
connector of the AMD Athlon. Which works great.
Overclocking the SocketA
AMD Athlon or Duron does not require a "Gold-Finger"-device.
The trick is cheaper but definitly harder to execute. Or better:
it's a more precise excersise.
Warning: Overclocking
may harm your CPU, hardware and even wreck the data stored on your
harddrive, so please read the disclaimer!
|
 |
The start ...
This project I started out with reading some usefull
overclocking tips at several overclocking-webpages like:
Athlon: using Afterburner
I first started by ordering the OutsideLoop
Afterburner. Alternatives are: FreeSpeed
and Maximizer.
These devices are often called "Gold-Finger"-devices, which
make overklokken very easy.
Next step was installing proper temperature monitoring
software.
The software that came with the Asus
K7M mainboard was sufficient, but later I started playing with the
nicer MB Monitor
(it supports a lot of mainboards, check it out !).
The Afterburner came with simple instructions on how to take the Athlon
a part (bey bey waranty)... Just some things they migth have mentioned:
The AMD Athlon 500 Mhz
default runs at 1.60 Volts...
Next step: mount the Afterburner on the Athlon and put the Athlon back
in it's mainboard slot. The first thing I tried was running at 500 Mhz
with a VCore of 1.60 Volts.
These are the settings: FREQ = 4 (both dials) VCORE = 5
Since this worked perfectly, time to go further: FREQ = 7 (both dials)
VCORE = 7 (650 Mhz)
I first tried VCORE = 6 (1.65 Volts) but this did not work at all... a
1.70 Volts VCore did the job perfectly,...
My next step was going for 700 Mhz: FREQ = 8 (both dials) and VCORE =
8 (since VCORE = 7 did not boot at all), here are the results (after running
the Unreal Tournament Intro for 4 hours):
Clock: 700 Mhz
Temperatur: 38 degrees Celcius (open tower) and 45 degrees Celcius (tower
closed)
This is what it looks like:
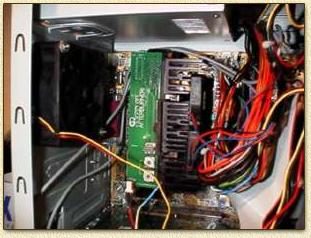
Here you have a look into my PC,...
I placed an additional fan to suck out the hot air...
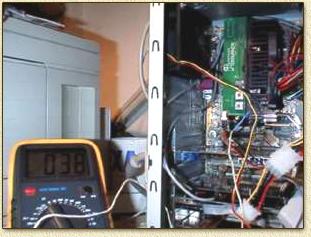
I figured the mainboard temperature
sensor would not be acurate enough so I placed a heat sensor on the CPU
for some serious temperature indication (which was actually about 8 degrees
higher than the mainboard sensor indicated) .
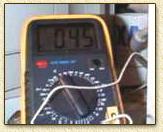
Putting the cover back on my PC did
instantly increase the tempearture 7 degrees. This was a good indication
that I can tune the airflow in the PC ....
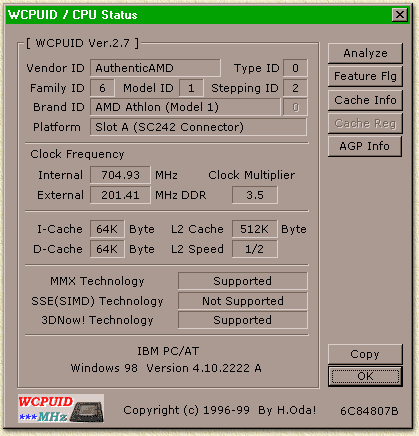
Some notes:
On should be able to go further, but the cache speed
might need altering (succesfull clocking to 750 Mhz have been reported
without altering the cache speed. Default cache speed is 1/2 (at 700 Mhz
I used 1/2 too). Most 800 Mhz overclocking require a cache speed 1/3.
Some benchmarking:
For benchmarking I used SiSoft
Sandra and 3DMark2000.
Since I have 2 computers, I grabbed the oportunity to compare both systems.
Initial I had a Intel Pentium
III 450Mhz with a Creative
Labs Annihilator (Geforce)
which I overclocked (FSB = 105Mhz) to 500 Mhz. The other computer has
an AMD Athlon 500 with
a Voodoo3-3000, running
at 700 Mhz using the OutsideLoop
Afterburner.
I tested both machines using the Geforce and the Voodoo 3D-cards, and
these where the results:
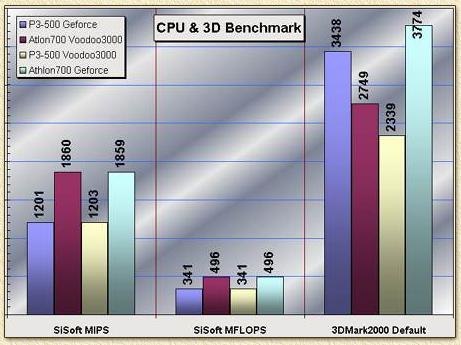
The Geforce definitly increases 3D performance and seems
slightly depended on the type of CPU and CPU-Speed. The same goes for
the Voodoo3-3000 card.
Next step
(to be done as soon as I get faster dimms) will be increasing the FSB
starting with 105. I tried it already with my current dimms, but somehow
the system gets unstable....
|


