| Print this page - use Landscape |
Search the WeetHet Pages |
|||
| WeetHet is being updated! - Current articles will slowly move to www.tweaking4all.com For excellent webhosting that is reliable and affordable, we highly recommend: LiquidWeb |
||||
|
On this page ...
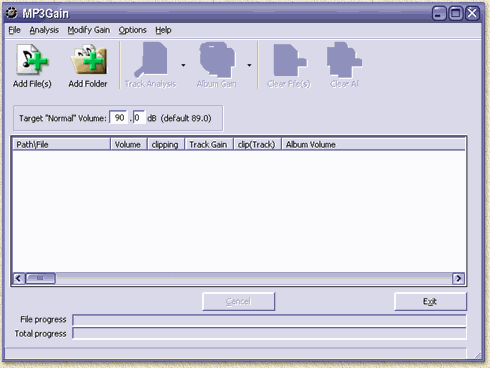
What does it do? MP3 Gain analyzes the selected MP3's and determines the "volume" of each of the sound files. Based on a preset volume level (default is 89,0 dB, but values like 90 dB work fine too) it shows you how much volume has to increase or decrease to get the same volume level. After analyzing the files, MP3 can apply the required increase or decrease in volume of each individual file. Which results in a collection of music files with a similar volume level. Step 1: Download and Install You can download MP3 Gain from their website (MP3 Gain homepage) or from the WeetHet download page. I recommend going for the FULL install of the STABLE version. AT the time of this writing, the stable version is 1.0. If you know what you're doing, you can also select the NORMAL version without the Microsoft Visual Basic DLL's. If you downloaded the file from WeetHet: first extract the file. After extracting the file or after downloading the file from the MP3 Gain homepage, you can double click the EXE file. Follow the steps and you'll have MP3 Gain in no time. Now start MP3 Gain from the Windows START menu. Step 2: Selecting files Basically we now see MP3 Gain with an empty list;
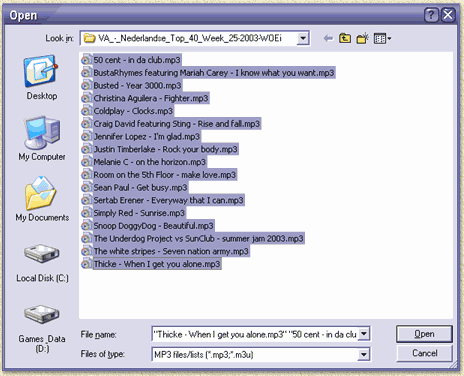
Click the "Add File(s)" button which will open a file dialog window. Tip: MP3 Gain also supports drag-and-drop from the Windows Explorer!
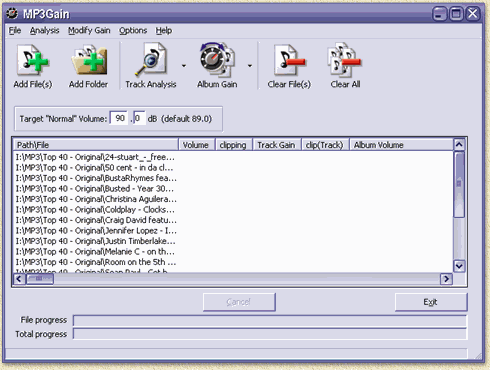
The dialog allows you to select one or more files at a time. Selecting a range (holding the SHIFT key) or multiple items (holding the CTRL key) is just the same as you are used to with the Windows Explorer. After completing your selecting, click "Open" and the selected files will be added to the list;
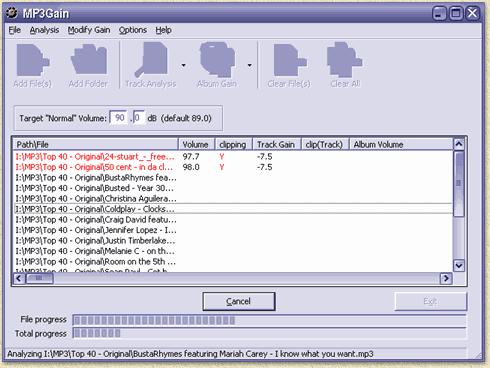
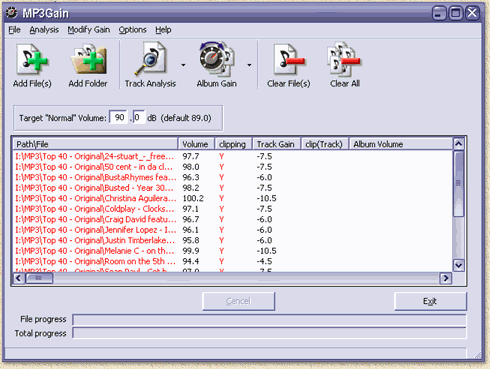
Step 3: Analyzing the files You can repeat step 2 as often as you like. Once the list is complete, you can click the "Track Analysis" button. Note: By default the "Target "Normal" Volume" is set to 89,0 dB ... if you want to, you can change this. MP3 Gain will now open each file and take a look if the MP3 has clipping issue and what the current volume level is. It will also show the required increase (+ values) or decrease (- values) of the volume to match the target you set.
MP3 Gain is pretty quick in analyzing the files ... Step 4: Adjust volume of the files After analysis, MP3 Gain will show you the results;
Now you can adjust the MP3 files by simply clicking the "Album Gain" button. This process takes amazingly little time. You'll notice, while in progress, that the "Cancel" button is enabled and that the two progress bars (file and total progress) are busy. Once the "Exit" button is enabled again and the "Cancel" button is disabled, MP3 Gain is finished. You can now either close the program (click "Exit") or choose "Clear All" and continue with the next album - and that's all folks! |
||||

