|

| Print this page - use Landscape |
Search the WeetHet Pages |
|||
| WeetHet is being updated! - Current articles will slowly move to www.tweaking4all.com For excellent webhosting that is reliable and affordable, we highly recommend: LiquidWeb |
||||
|
On this page ...
Burning a DVD to a writebale DVD For starters, we need : Smartripper or DVD decrypter (to copy a DVD to harddisk), DVD2ONE and Nero Burning rom. Both DVD2One and Nero, are available as a Trial version. SmartRipper can be downloaded from the download page. Note: It is recommended to
use 2 empty directories. 1 for Smartripper (to dump
the ripped DVD in) and 1 for DVD2ONE for storing the
converted DVD files. This will save you a lot of confusion when burning
the DVD. Ripping First we do need to rip the DVD to harddisk. We will use Smartripper for this purpose. An alternative description on how to use can be found on the SmartRipper page. Note:
More recent versions of DVD2One (v1.1.1 seems to work
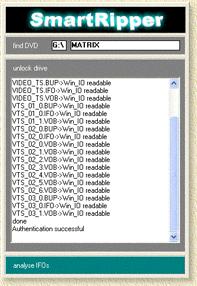
OK) do not always to need the SmartRipper process. Tip: For the DVD to "unlock" it can be helpfull to play the DVD for a bit using PowerDVD or WinDVD! After inserting the DVD in your DVD-player, start Smartripper. Smartripper will analyze the disc:
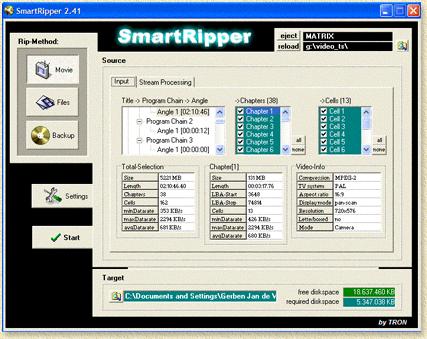
In the next screen on the right, you can select either to rip the movie only (Movie), or all files (Files).
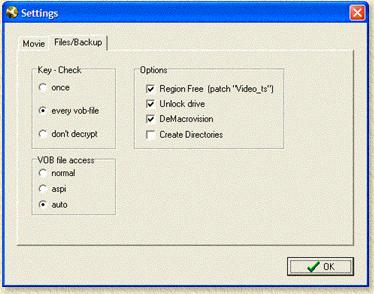
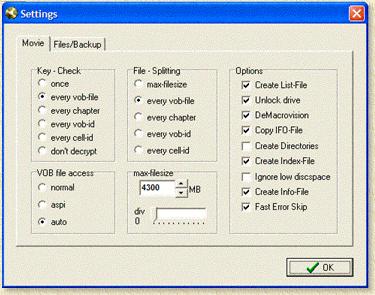
We select movie here, since we want to rip only the movie. Verify these settings below (click "Settings") as they seem to work very well:
At the bottom of the SmartRipper window we can set a target folder. Once you have done that, click Start and SmartRipper starts ripping the required file(s). This takes 30 to 60 minutes. Now we will need DVD2One to reduce the size of the movie. This is needed as most movies are app. 7 Gb large (stored on a so called DVD-9 which uses two layers to store the movie, with a maximum size of 9 Gb!). Our (re)writeable DVD (DVD-5) can only hold 4,7 Gb! So the original size will not fit on these puppies. After starting DVD2One you will see this screen (version 1.1.1 screenshots):
Optionally choose a language (lower left corner) and click "Next" to continue.
Since we focus on copying only the movie, at the "Source" field, select the folder you used with SmartRipper for dumping the files. Use "Destination" for dumping the results. Note: if you did not use SmartRipper for ripping the files to harddisk, the choose the DVD-Rom drive (folder VIDEO_TS) as a source! Do not change the "DVD±R(W)" value!! Click "Next". Note: You can also rip the entire DVD (have SmartRipper rip ALL files). In that case choose at "Copy Mode" the option "Full Disk". I personally don't recommend doing so, as menu's and extras take additional space on your DVD, meaning that the movie will have less space on the disc, which will show in the quality later on. In the now appearing screen we must select a title. Select the largest (time wise) title - When using "Movie" with SmartRipper, you normally will see only 1 title.
If more than one title shows, then select the largest one. Click "Next". In this screen we can select audio track(s) and subtitle(s).
Now click "Start" and DVD2ONE will start converting the movie file.
Burn DVD with Nero Burning rom Nero usually starts either with the "New compilation" window or the wizard.
If neither appear, select "New" for the "File" menu. Using the Nero wizard: in the first screen select DVD, in second screen select compile new CD, in the third screen select other CD types and in the last screen select Video DVD. In the New compilation window, select on the leftside DVD-video (in the upper left corner select DVD and not CD) and click New on the rightside. On the rightside an Windows Explorer kind-a screen appears. On the leftside, you will see a DVD compilation, showing audio_TS and Video_TS.
With the file-explorer on the right, browse to the folder where DVD2ONE dumped the converted DVD files and drag them to video_TS. There should be at least one 1 IFO, 1 BUP and 1 VOB file in the Video_TS folder (it can also be more than 1). Now click the burn button (don't forget to insert
an empty DVD in the DVD-writer) and after about an hour, you DVD is
finished. |
||||