|
On this page ...
|
In this article, I will show you how to, simply,
create a cool lightning.
This does not require any special plugins, action-files,
photoshop version or whatever. Even newbies should master this trick
pretty quick.
It is most likely that you can use this trick
with other Adobe products, like the special edition of Photoshop
or Adobe Elements, as well.
|
 |
Steps to follow ...
|
1. Set colors to Black and White
Use the color-setting in the tools window as shown
on the righ, the red arrow indicates the settings: (the background
is black and the foreground should be white)
2. Create a new image
Use the menu "File" and select
"New".
A new window appears, enter the size values here
as shown.
I usually startout with an image size of about
800 wide and 400 pixels high, suitable for most situations. Ofcourse
other values will work too. Click the "OK" button
when you're done
3. Make sure the background is black
If you don't have a black background no; Press
CTRL+A (Select All) and press the delete-button, this will
make the background go black.
|
 |
|
4. Create new layer with a gradient fill
Click the "New Layer" button
or press Shift+Ctrl+N or select from the menu "Layer"
- "New" - "Layer ..." (these last
two require you to click the "OK" button). The
"New Layer" button can be found in the layer-window,
in the lower right corner as seen in the snapshot on the right.
Now it's time to create a gradient fill for that
particular layer.
 |
Click the Gradient tool in the toolbar.
Your toolbar might be showing the "Paint Bucket Tool"
icon right now, if so click this icon and keep the left mouse
button down until the little menu appears as shown in the
snapshot on the left.
Click the "Gradient Tool".
|
|
 |
|
In the upper left corner of Photoshop now appears the additional
features that come with the gradient tool.
Make sure the gradient goes from black to white (not transparant!).
If needed you can click the effect dropdownbox as show below to
select the black-to-white gradient as shown:
|
|
 |
Now click in the new image somewhere in the lower half of the image
and keep the left mouse button pressed and drag it up to somewhere
in the upper half of the image.
Now you can release the mosue button and a gradient fill will appear.
The type and shape depends on how far you dragged and where you
started to drag.
On the left you see an example what it could look like ...
|
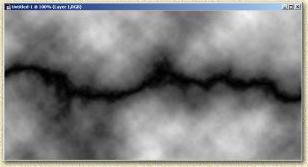
5. Difference Clouds and inverting the image
Now select from the menu "Filter" -
"Render" - "Difference Clouds", you
will see that the gradient fill is transformed to a lightning,... well
and inverted one that is.
So now let's invert that image, select "Image"
- "Adjust" - "Invert" from the menu
(or press Ctrl+i). Wow, almost a good one,...

6. Adjust levels
From the menu now select the "Image"
- "Adjust" - "Levels" (or press Ctrl+L).
Now a window appears and allows you to adjust the image levels. Move the
little black arrow (indicated by the red big arrow in the snapshot below)
to the right up to the point where you think you've got a cool lightning.
The results looks pretty good to me ...
;
Try experimenting with different directions
of gradient fills and see what they do.
A tip for those who would like to add
the newly created lightning to existing images;
1. copy the layer to the image that should
contain the lightning.
2. open the layer style page of this new layer in you image (double click
the layer in the layer-window)
3. set the blending options to "screen" as shown
below:
This might result in something like this
(I slightly rotated the lightning and added some background clouds):

|
