| Print this page - use Landscape |
Search the WeetHet Pages |
|||||||||||||||
| WeetHet is being updated! - Current articles will slowly move to www.tweaking4all.com For excellent webhosting that is reliable and affordable, we highly recommend: LiquidWeb |
||||||||||||||||
| s
On this page ...
What is IRC and what is mIRC? IRC (Internet Relay Chat) is a virtual environment where people from all over the world meet and chat. Basically IRC is a large collection of chat-rooms. IRC chatting is like chatting
with a keyboard: you type messages. Each IRC users
will have to use a small application for IRC access, like for example mIRC.
This little tool connects you to a central server within the IRC network.
All servers within the IRC network are inter connected,
s messages you type will be relayed to all the other servers, so everyone
can see you typing (if they are in the same chatbox). Chatboxes are
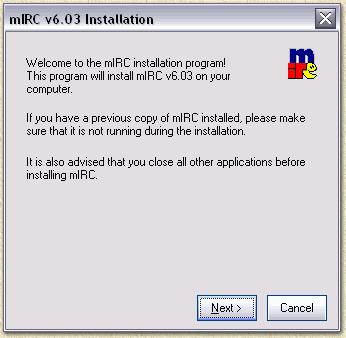
public, but you can also have private chats with friends and relatives. mIRC can be downloaded from the mIRC Homepage. IRC has more possibilities than just chatting, it will also allow you to download files as well. Using mIRC (download app. 1 Mb) is therefor most definitly worth the use! The next steps will show you how to download mIRC, install it and get it to work. Downloading mIRC We'll guide you trought the process step by step. There are other explanations available on the web, for example: http://www.dse.nl/~hanswim/. How and where to download mIRC? As with most application that you can find on the internet, mIRC is also downloadable as a little file that installs the application for you. It's all a matter of finding the proper version. mIRC has been written for the more recent Windows versions, like Windows 95, 98, 2000, NT and Windows XP. There is no version for Apple Macintosh, Linux and/or other operating systems! Now go to the download page on the mIRC website and download the most recent version. On this page you will see, below a banner saying "mIRC x.yz, for Windows 95, 98, 2000, ME, XP, NT etc." (where x.yz = version number), you will see diffrent files (they are all the same though!) which can be downloaded from diffrent countries. Pick one. It doens't really matter which country you take. Some folk say that a country close by has a higher transfer rate, but that isn't always true. The next thing to download is the most recent serverlist. Again, go to the homepage of mIRC, below the header "New collection of IRC servers." you will find the most recent servers.ini file. Dowload it there or by clicking right here: servers.ini. Save the servers.ini file somewhere on your harddrive and make sure you don't forget where you put it. Installing mIRC OK let's do the real installation. Locate the file you just downloaded and double click it to start the installation.
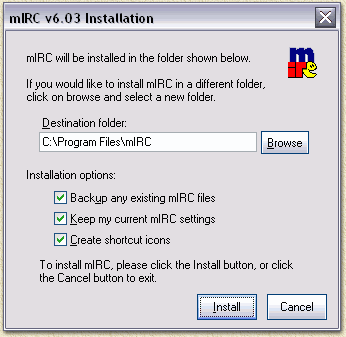
Click"Next >". A similar screen appears, asking you to agree to the user licencse agreement. Click "Yes". The next window asks you where to put mIRC, ususally the default location is just fine.
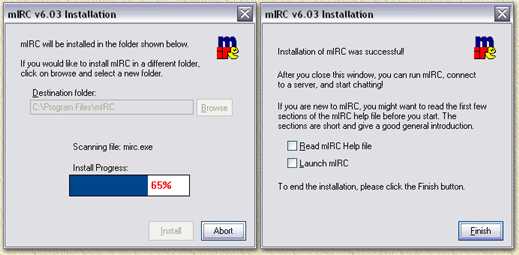
Click "Install". mIRC is now being installed (image on the left). The image on the right indicates that the installation has been completed. Make sure you uncheck "Read mIRC Help file" and "Launch mIRC" and click "Finish".
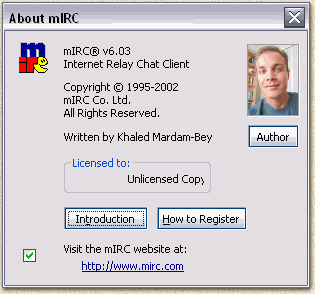
OK,the first steps have been taken, mIRC is installed. Using mIRC for the first time Start mIRC (you will find it in the windows START menu). The mIRC window appears with a welcome message:
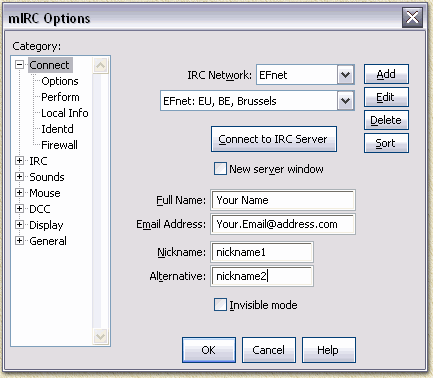
On the lefthand side in the window, uncheck the "Visit the mIRC website at" and close this window by clicking the little cross in the upper right corner. A window called "mIRC Options" appears. Copy the settings you see below, natturally replace "Your Name" with your own name. See the little table below:
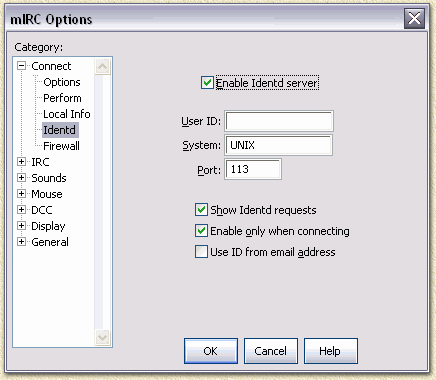
Note: You do not have to use your realname and/or email address! If you prefer to be unknown then that's OK, just make sure the email address looks as if it was a real one. Also, check the 'Invisible mode' option, in the lower part of this window. This might save you some unwanted crap. No, in the tree on the left, goto "Identd".
Note: users that are behind a firewall and/or NAT router: make sure port 113 is mapped to your PC!!! Now go back to the "Connect" screen (again in the tree on the left) and verify again NETWORK and SERVER! Now click "OK" and the options window will dissappear. In the mIRC window, you can now click the "Connect" button to connect to the IRC, or use the meny option "Connect" from the "File" menu.
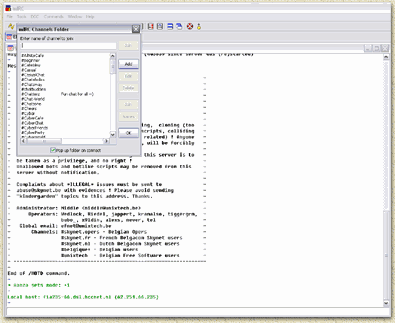
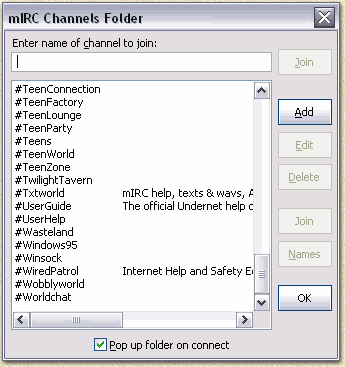
A lot of text appears to be passing the in the window and after a few seconds a window will open ("mIRC Channels folder"): You're connected to the IRC now.
The next step So what did just happen? Take some time and look around. If everything went right; mIRC is now connected to the IRD network. The IRC server of your choice did send some information, found in the large status window. The window called "Channels Folder" has also appeared. Here we see some popular IRC channels, try one! Double click the channel you want to try (or single click a channel and click the "OK" button).
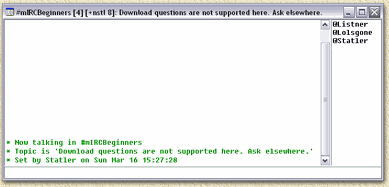
When opening a channel (you joined a channel) a new window opens.
On the rightside you will see the nicknames
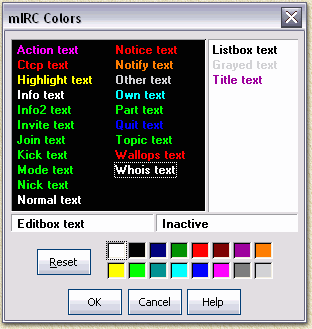
of the people on this channel. Your own nickname will appear here too. tip: Optimize screen colors By default, mIRC uses a white background. However, you might want to use a black bacjground. All colors in fact can be changed. Go tot the menu "Tools" - "Colors" (or press ALT+K). In this window you can change all colors;
All the text parts are obviously - simply click the text and choose a color. Less obvious is selecting the background color. Click below the "Whois text" text and choose a color. You'll notice that the background changed color. Some text might not be visible anymore (for example "Normal text" when selecting a black background). If this made you decide to leave the colors alone, then click "Cancel". If you have a new color palette designed to your needs and you want to apply it, click "OK". Next steps ... As you have just seen: chatting isn't that difficult in IRC. Naturally we still have a lot to learn, so keep playing a bit with it and try some other channels. The list of available channels (the 'Channel Folder') is incomplete!. Use the "/list" command in a open channel to get the entire list (which is HUGE). You can use CTRL+F to filter particular text parts in this list. Double click a channel in this list to open it. In the "Commands" menu you will find the most commonly used commands. The list command can be found here too. Again: leave a channel by closing the channel's window. You can leaven the IRC server (EFnet for example) as well by clicking the "Disconnect" button.
To reconnect, click the "Connect" button:
Each network has a large amount of channels, so looking for the channel you want might be pretty tricky and be like looking for a needle in a haystack..
Related articles: mIRC FAQ, How to download using IRC Additional questions on mIRC/IRC? Check the forum! |
||||||||||||||||


